Calendar is an important part of our day to day life. Calendar keeps us informed about the date and future event(s). And since Christmas is coming, so our tutorial for today is “How to Create a Calendar in Photoshop“, this is really a simple technique and the results are awesome! You can also use the UI Design on your app or website, just convert it to html and css to work 😉
You can download the PSD at the bottom of this tutorial!
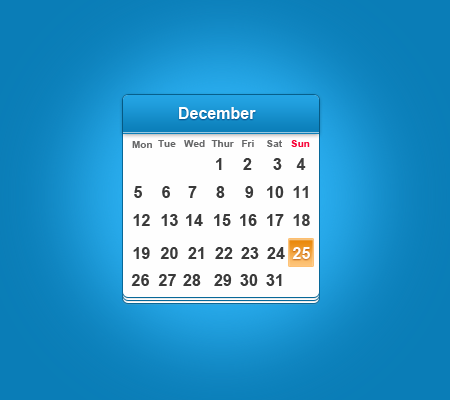
Final Product
Let’s Start!

Open your canvas and set the width 450px and height to 400px.

Fill the canvas with #0a7db7, name this as bg1. After that create a new layer name bg2, use Elliptical Marquee Tool (M) and draw a circle inside the canvas. Fill it with #2db2f4.
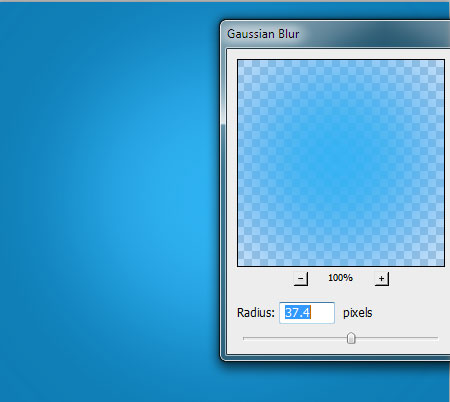
On Filters > Blur > Gaussian Blur > set to 37.4px and hit OK.

Select Rounded Rectangle Tool (U) and set radius to 5px, name this as body.
In Blending Options > Drop Shadow and set the Distance to 2px, Size 5px. Blend Mode to Normal.

Inner Glow, set the size to 1px and choke to 0.

In Stroke, set the size to 1px and change the color to #076899.

To achieve this, just duplicate the body layer (CTRL + J) and press arrow key up 2 times so it’ll move 2px.

Now create a new layer, name it header. Select Marquee Tool (M) and select the top part of the body layer.
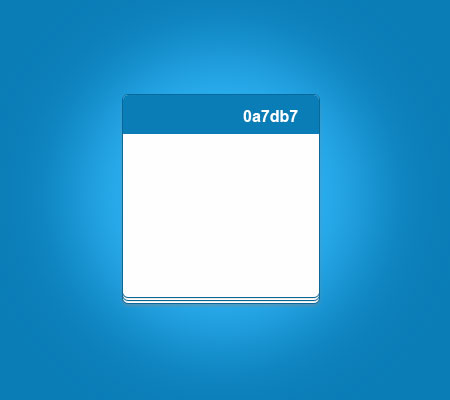
Fill it with #0a7db7. Now, hold CTRL + click on body layer while header is still selected and press SHIFT + I and hit delete. You’ll have something like the one above.

On header layer > Blending Options > Drop Shadow, set the Distance to 1px and Size to 5px.
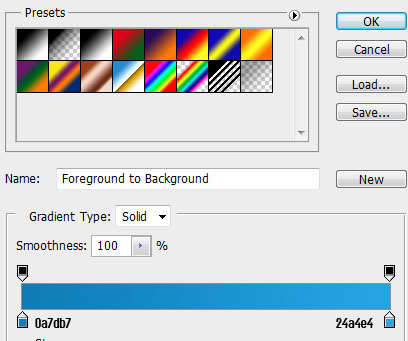
On Gradient Overlay follow the colors above, and set the angle to 90.

Create a new layer and select Single Row Marquee Tool (M), set the line just 1px above from the bottom of the header. Fill it with #FFFFFF

Here is the body of our calendar, I’ve also set the line opacity of the line layer to 58px.

Write the December text on the header, follow the settings above for text Drop Shadow.

Here is the final look of the header with text, you should have the same result.
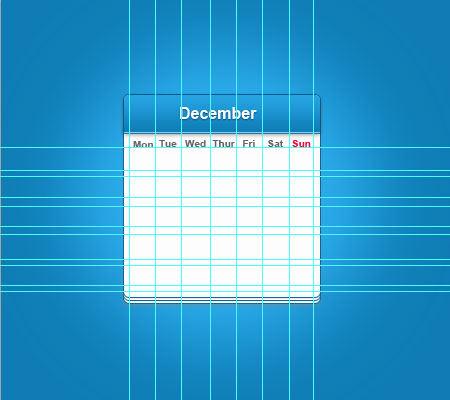
Add those days text above, font is Arial Bold 10pt #707172.
About the margin lines, I am not sure how to do this automatically (if you know how, please share with us) I did all of this manually, it may take some time of getting the right size for each. The best part is you’re patience will be put to the test :D.

I fill those spaces with numbers following the December Calendar Days. I use Arial Bold 16pt #3a3a3a.
What I did with the dates is created the first set in group, and then duplicate them and arranged until I have the complete dates.

Create a new layer and select the 25 date, we will highlight this as a sign of special event on our calendar.

In Blending Options > Gradient Overlay follow the settings above

In Gradient settings, set the opacity to 100% and angle to 90.
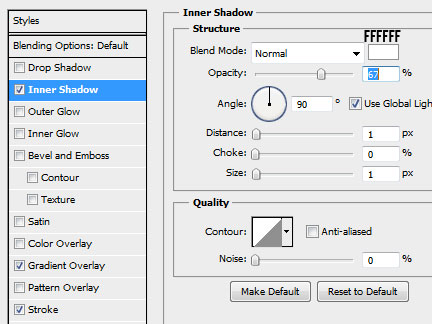
Inner Shadow set the distance to 1px and size to 1px, color #FFFFFF.

In Stroke set the size to 1px and opacity to 100%.

You’ll have something like the one above, now to change the text color of 25 set the color to #FFFFFF.

In 25 text drop shadow, set the size and distance to 1px. Follow the color above.

Here is the end result! Clean and minimalist calendar, you can use this on one of your projects or if you created a different version that would be so cool! If you have other suggestions to make it easier or faster for creating such design, please share with us on the comments below.
[sociallocker id=”3494″]
Download Now!
[/sociallocker]

